
Breads & Muffins
Showing posts with label Breads & Muffins. Show all posts
Breads & Muffins
Recipes



- Preheat the oven to 350F. Prepare a 12-cup nonstick/silicon pan with either olive oil or baking spray. Or use silicon cupcake liners.
- Mix dry ingredients (almond flour → salt) in one bowl and wet ingredients (eggs → vanilla) in another larger bowl. Stir each well.
- Add the grated carrots and chopped walnuts to the wet ingredients.
- Slowly add the dry ingredients into the wet ingredient bowl and stir until well combined.
- Divide batter evenly among the 12 cups - each cup should be full.
- Bake for ~20 minutes. Check before you take them out of the oven; temperatures may vary by oven and you want the center to be moist but not jiggly.
Glucose-friendly carrot muffins

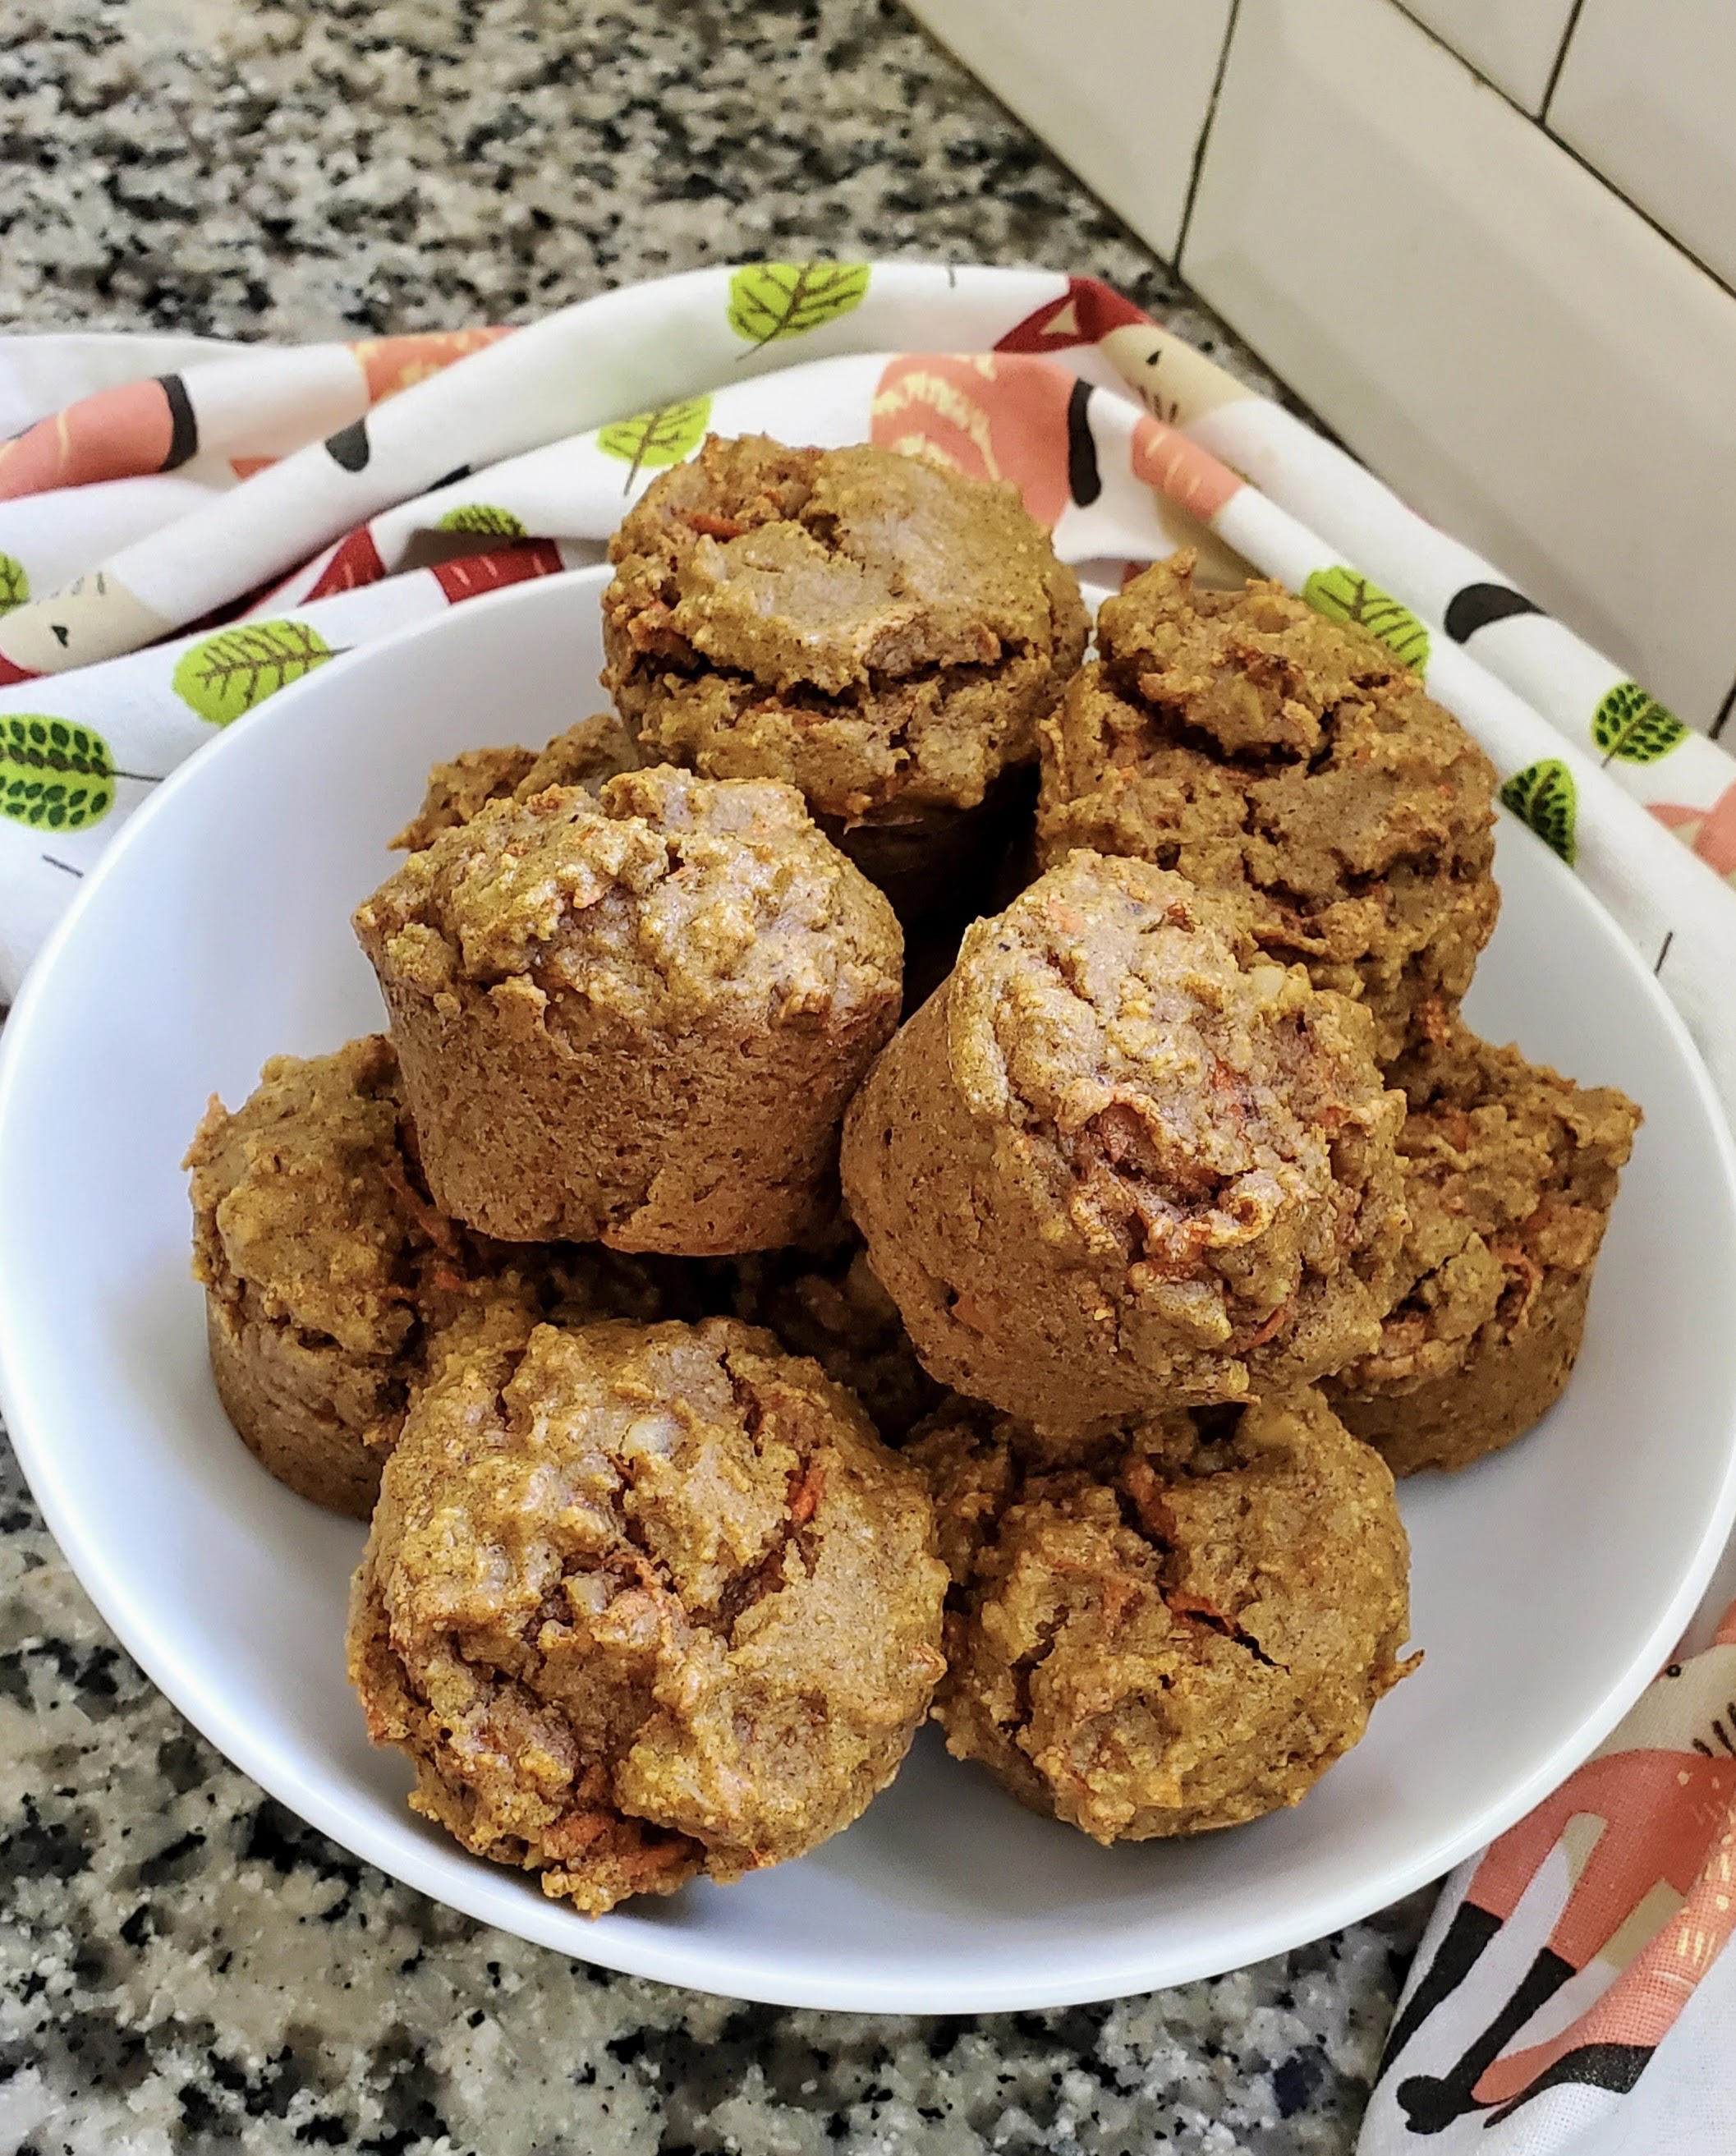
Besides the sugar-free blueberry muffins I bake regularly, there's nothing cake-like in my world because it's really not worth the havoc it wrecks on my body. But I can't pretend I don't miss cake. Especially carrot cake!
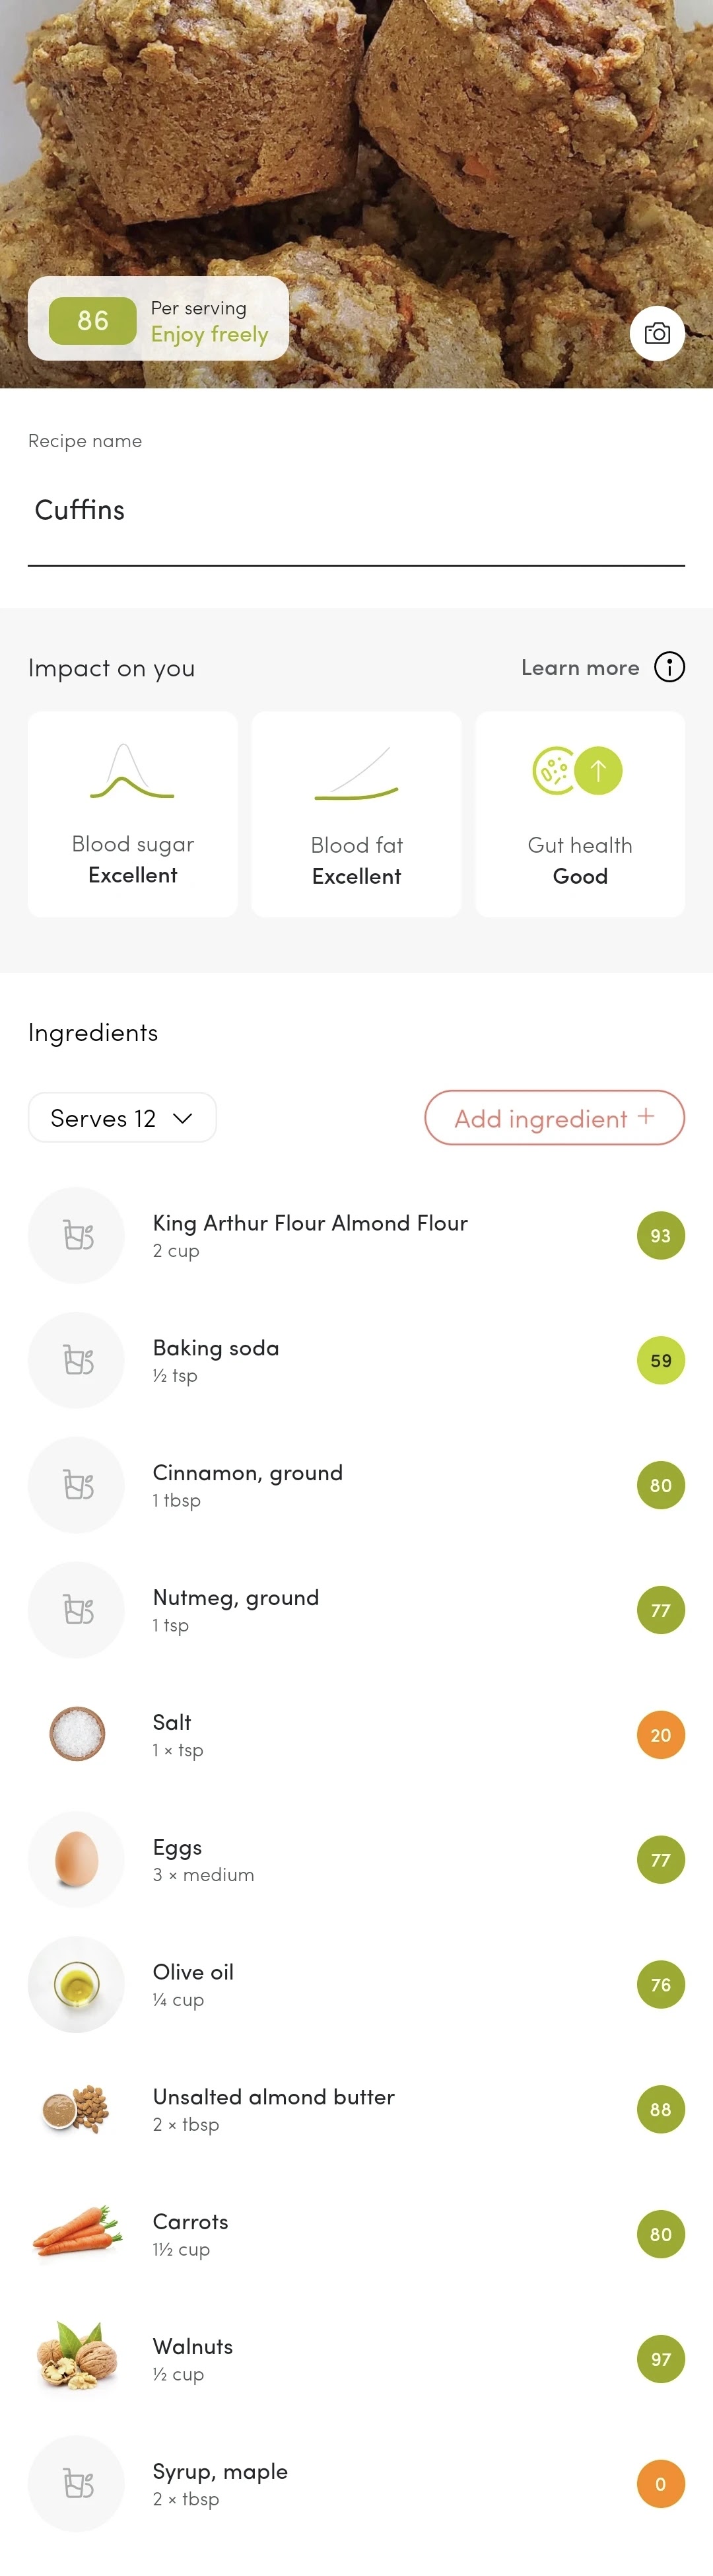
So when this amazing @sonjamk carrot cuffins recipe popped up via Levels, I paid attention. As I skimmed the ingredients, I was pretty sure it was going to be a winner, but checked it in the ZOE app to be sure and voila! These muffins get an 86 (my goal is to eat meals that get a score of 75 or higher).
Here's how these muffins score for me and I have very poor blood-glucose control (my story here). And yes, that's actual maple syrup in the recipe:

Called "Cuffins" in Sonja's original recipe (because they are cake-like) I had high hopes for these little things: I really wanted them to be carrot CAKE. And guess what? I think they are, even without icing. I'm going to give you the ingredients for Sonja's cashew icing/frosting below, but I can't handle cashews so I didn't bother with any frosting.
What I did try was eating them with full-fat Greek yoghurt. Oh man... so good. And if you eat one of these muffins with just half a cup of Greek yogurt, you get yourself over 18 grams of protein into the bargain.

Let's get into the recipe.
You need a couple of mixing bowls and a standard 12-cup muffin/cupcake tray.

Combine the dry ingredients in one bowl, the wet ingredients in another. Then grate the carrots and chop the walnuts (or whatever nuts you generally prefer in a carrot cake).
Add the carrots and walnuts to the wet ingredients then slowly add the dry ingredients to the wet ingredients and stir until well combined.

The muffin cups should be close to full, then pop them in the oven for about 20 mins.

They're done when they're golden and a toothpick inserted into the middle of a muffin comes out clean.
Pop them out onto a cooling tray for at least 10 mins before serving.
These muffins can be stored in the freezer for up to 6 months so do yourself a favor and bake a double batch!
HOW TO MAKE GLUCOSE-FRIENDLY CARROT MUFFINS
INGREDIENTS
- 2 cups of almond flour
- 1/2 teaspoon baking soda
- 1 tablespoon ground cinnamon
- 1 teaspoon nutmeg
- 1 teaspoon salt
- 3 eggs (I haven't tried a vegan substitute but I bet it would work fine)
- 1/4 cup of olive oil
- 2 tablespoons of almond butter
- 2 tablespoons of maple syrup
- 1 tablespoon pure vanilla extract
- 1 and a half cups of shredded carrots
- 1/2 a cup of chopped walnuts (or whatever nut you prefer)
- Optional: 1 scoop of vanilla protein powder
Cashew cream frosting (optional)
- 2 cups of raw cashews, soaked
- 3/4 cup unsweetened coconut cream OR cream cheese
- 2 tablespoon lemon juice
- 1 tablespoon vanilla extract
- 1 tablespoon maple syrup
- 1/8 teaspoon sea salt
STEP BY STEP
- Preheat the oven to 350F. Prepare a 12-cup nonstick/silicon pan with either olive oil or baking spray. Or use silicon cupcake liners.
- Mix dry ingredients (almond flour → salt) in one bowl and wet ingredients (eggs → vanilla) in another larger bowl. Stir each well.
- Add the grated carrots and chopped walnuts to the wet ingredients.
- Slowly add the dry ingredients into the wet ingredient bowl and stir until well combined.
- Divide batter evenly among the 12 cups - each cup should be full.
- Bake for ~20 minutes. Check before you take them out of the oven; temperatures may vary by oven and you want the center to be moist but not jiggly.
- Let the muffins cool on a wire rack for 10 mins before serving. Leftover muffins can be stored in the fridge for up to 2 days and in the freezer for up to 6 months.
How to make Cashew Creme frosting:
- A key step is soaking the cashews for 4 hours or for a quick option, in boiling water for 20 minutes.
- Then, in a high-speed blender or food processor, blend all the ingredients together until thick and creamy.
Remember to let the carrot muffins fully cool before adding the frosting, otherwise the frosting will slide off.
Breads & Muffins
Recipes
Vegan


 All the ingredients together are really pretty! And yes, that's pink Himalayan rock salt in there because it's another one of those small but mighty changes we can all make to our diets. In this case, we're exchanging the micro-plastics now found too often in commercial sea salt for the thousands of beneficial minerals found in rock and desert salt.


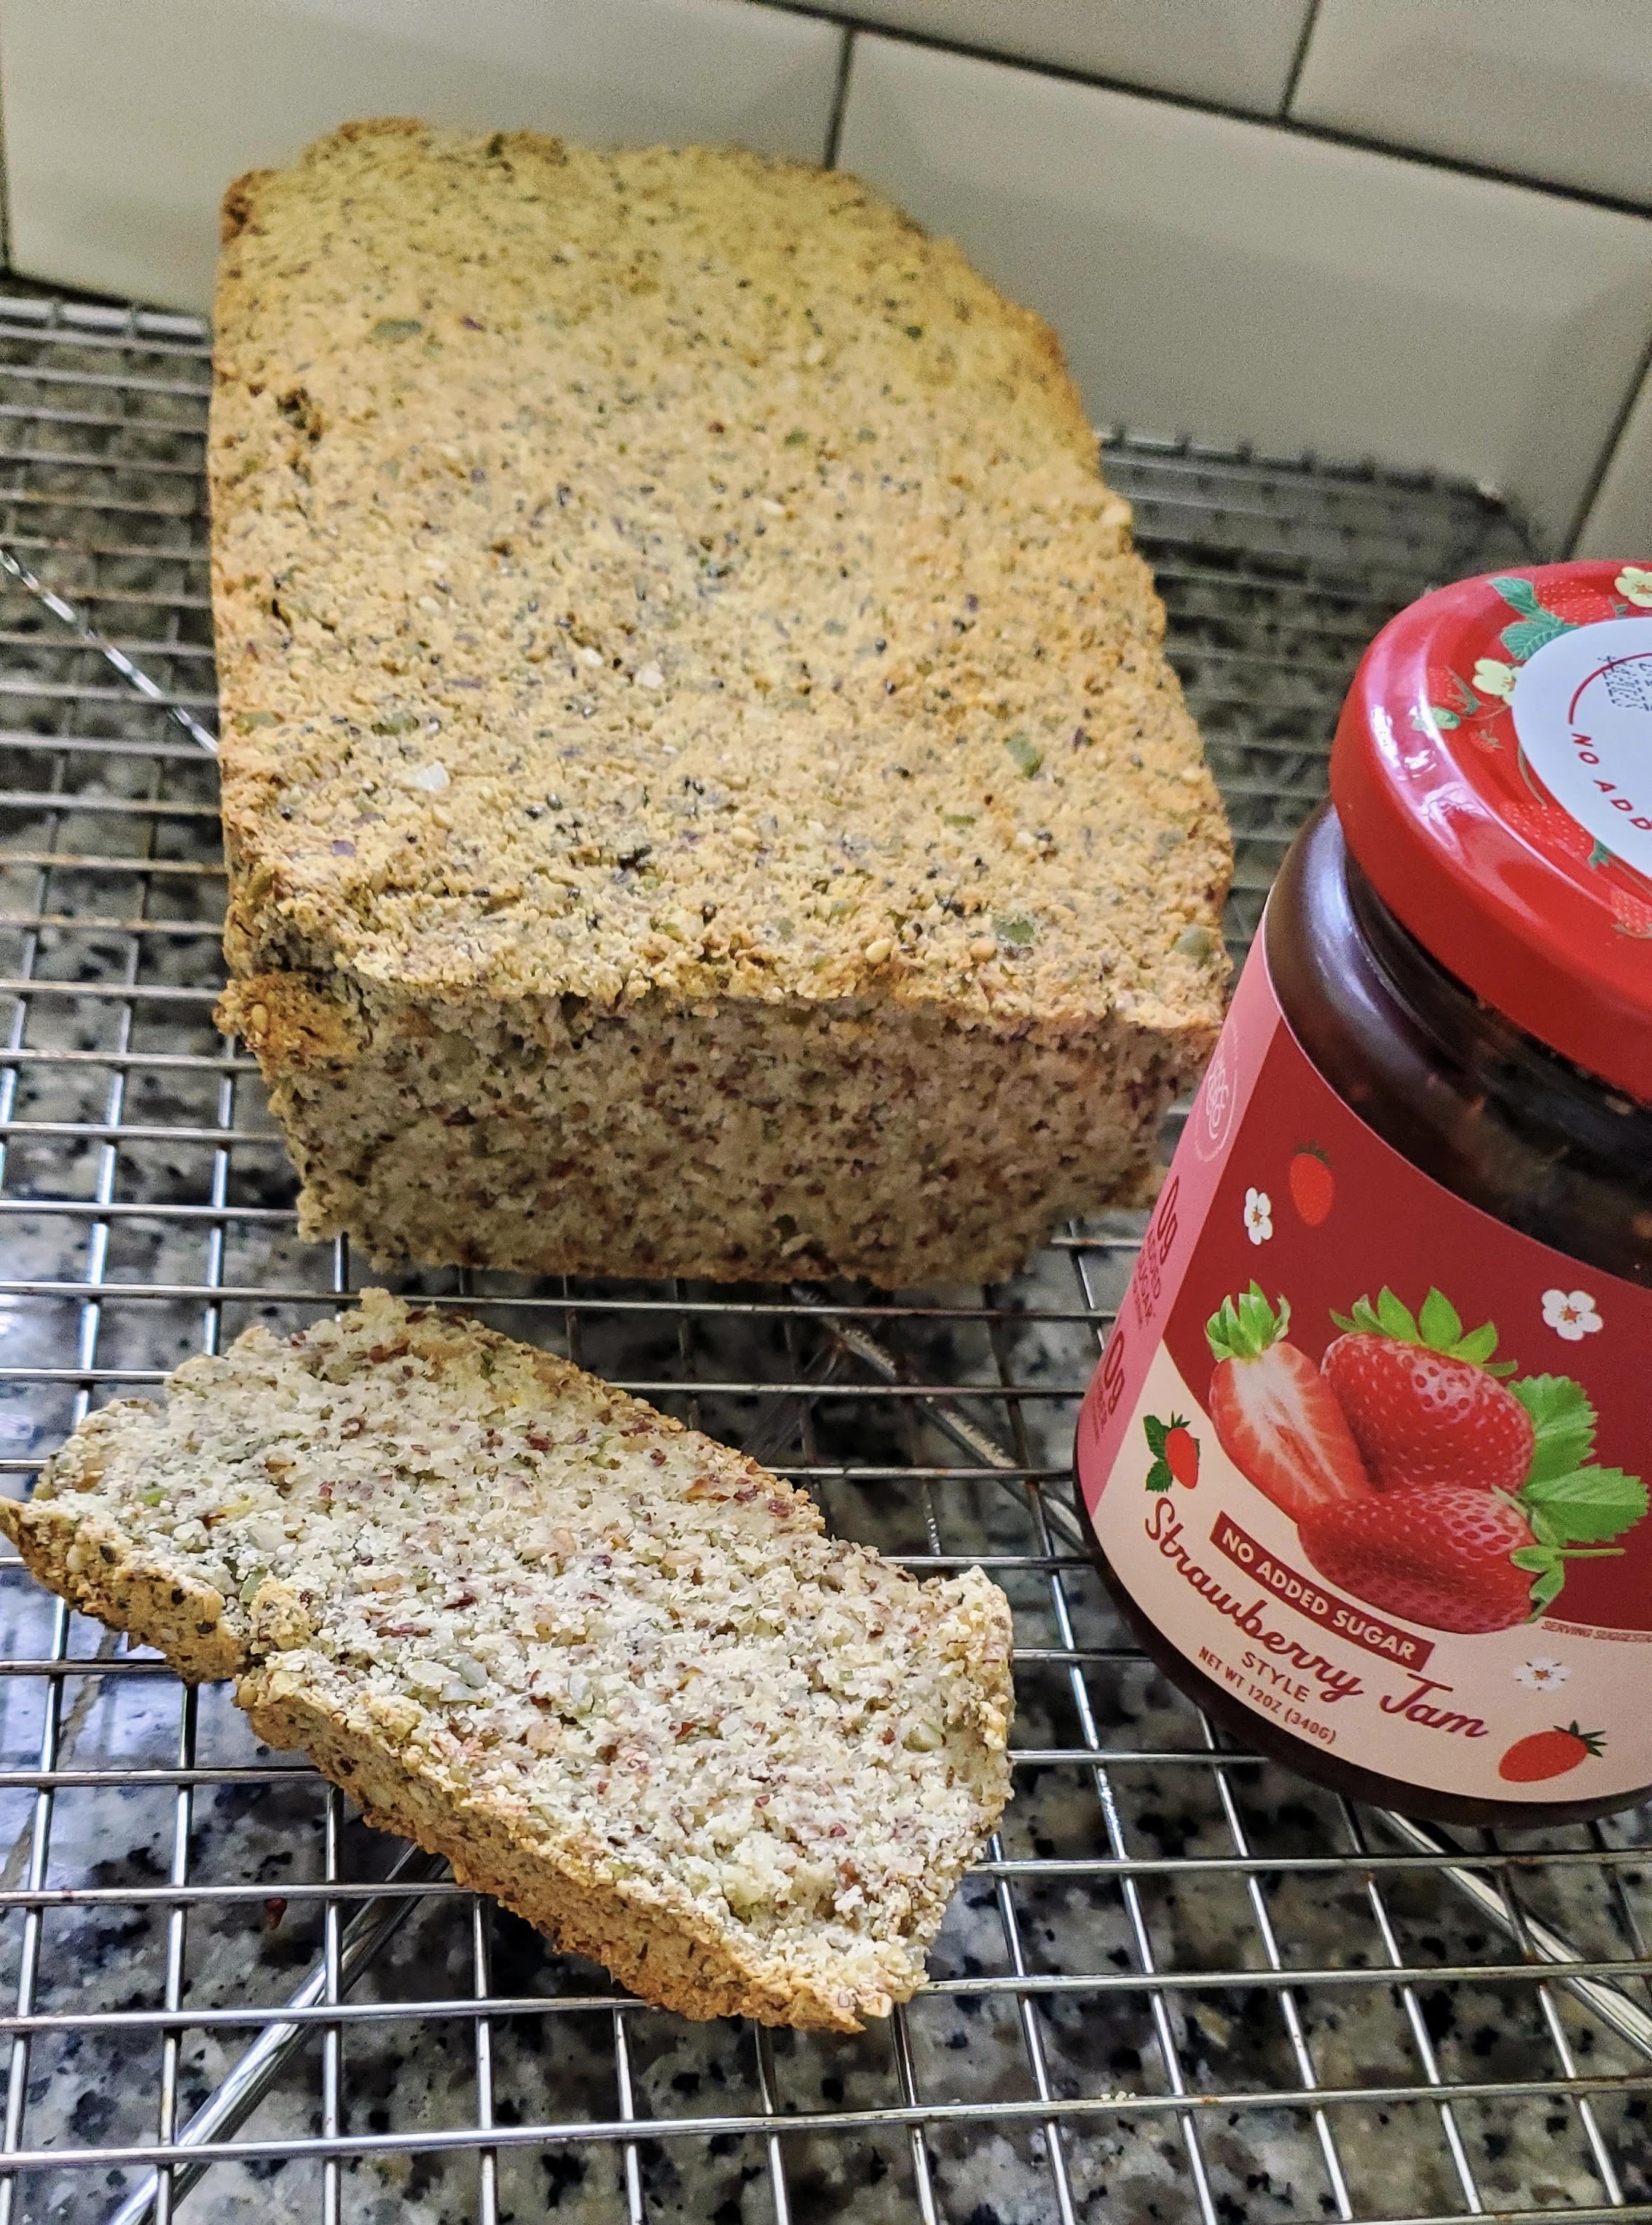
 You need to let the loaf rest for a few hours before you cut it. But if you can't resist lopping off an end slice to eat hot, I won't tell anyone.
Nutty seed bread (grain free)
I have poor blood-sugar control so I was not surprised to see that almost all grains score very low for me in the ZOE app. This means that in anything other than very small quantities, they cause big glucose spikes, which we all need to avoid really. A lot of grains (especially highly processed and refined versions) also suppress the growth of the good bugs that we need for a healthy gut microbiome.
I've lived pretty-much grain free for a long time now because they just make me feel bad, so I've done my share of experimenting with grain-free bread recipes. This recipe is my winner and ZOE agrees (see the score of 98 below). It's packed full of almond and coconut flour, and lots of seeds (including pumpkin, flax, sesame, and chia). It's not a "light" bread, so it's really satisfying. It freezes and toasts beautifully, and thanks to the sesame seeds, it smells heavenly when it's baking and if it smells like bread... well, it's bread! Oh, and it's gluten-free, vegan, and keto approved if those things matter to you.

So let's get to the making of it!

Step 1: Grind up your shelled pumpkin seeds into a course meal. I'm showing you a picture of what I use because to get a course meal, you need to be using shelled seeds, usually called "pepitas" in the US. They are nutritional superheroes so it's worth the step of getting them into this bread: they're rich in protein, fibre, magnesium, potassium, zinc, and iron. And studies show that they may support blood-sugar balance, improve cholesterol levels in postmenopausal women, help regulate blood pressure, and benefit bladder health.
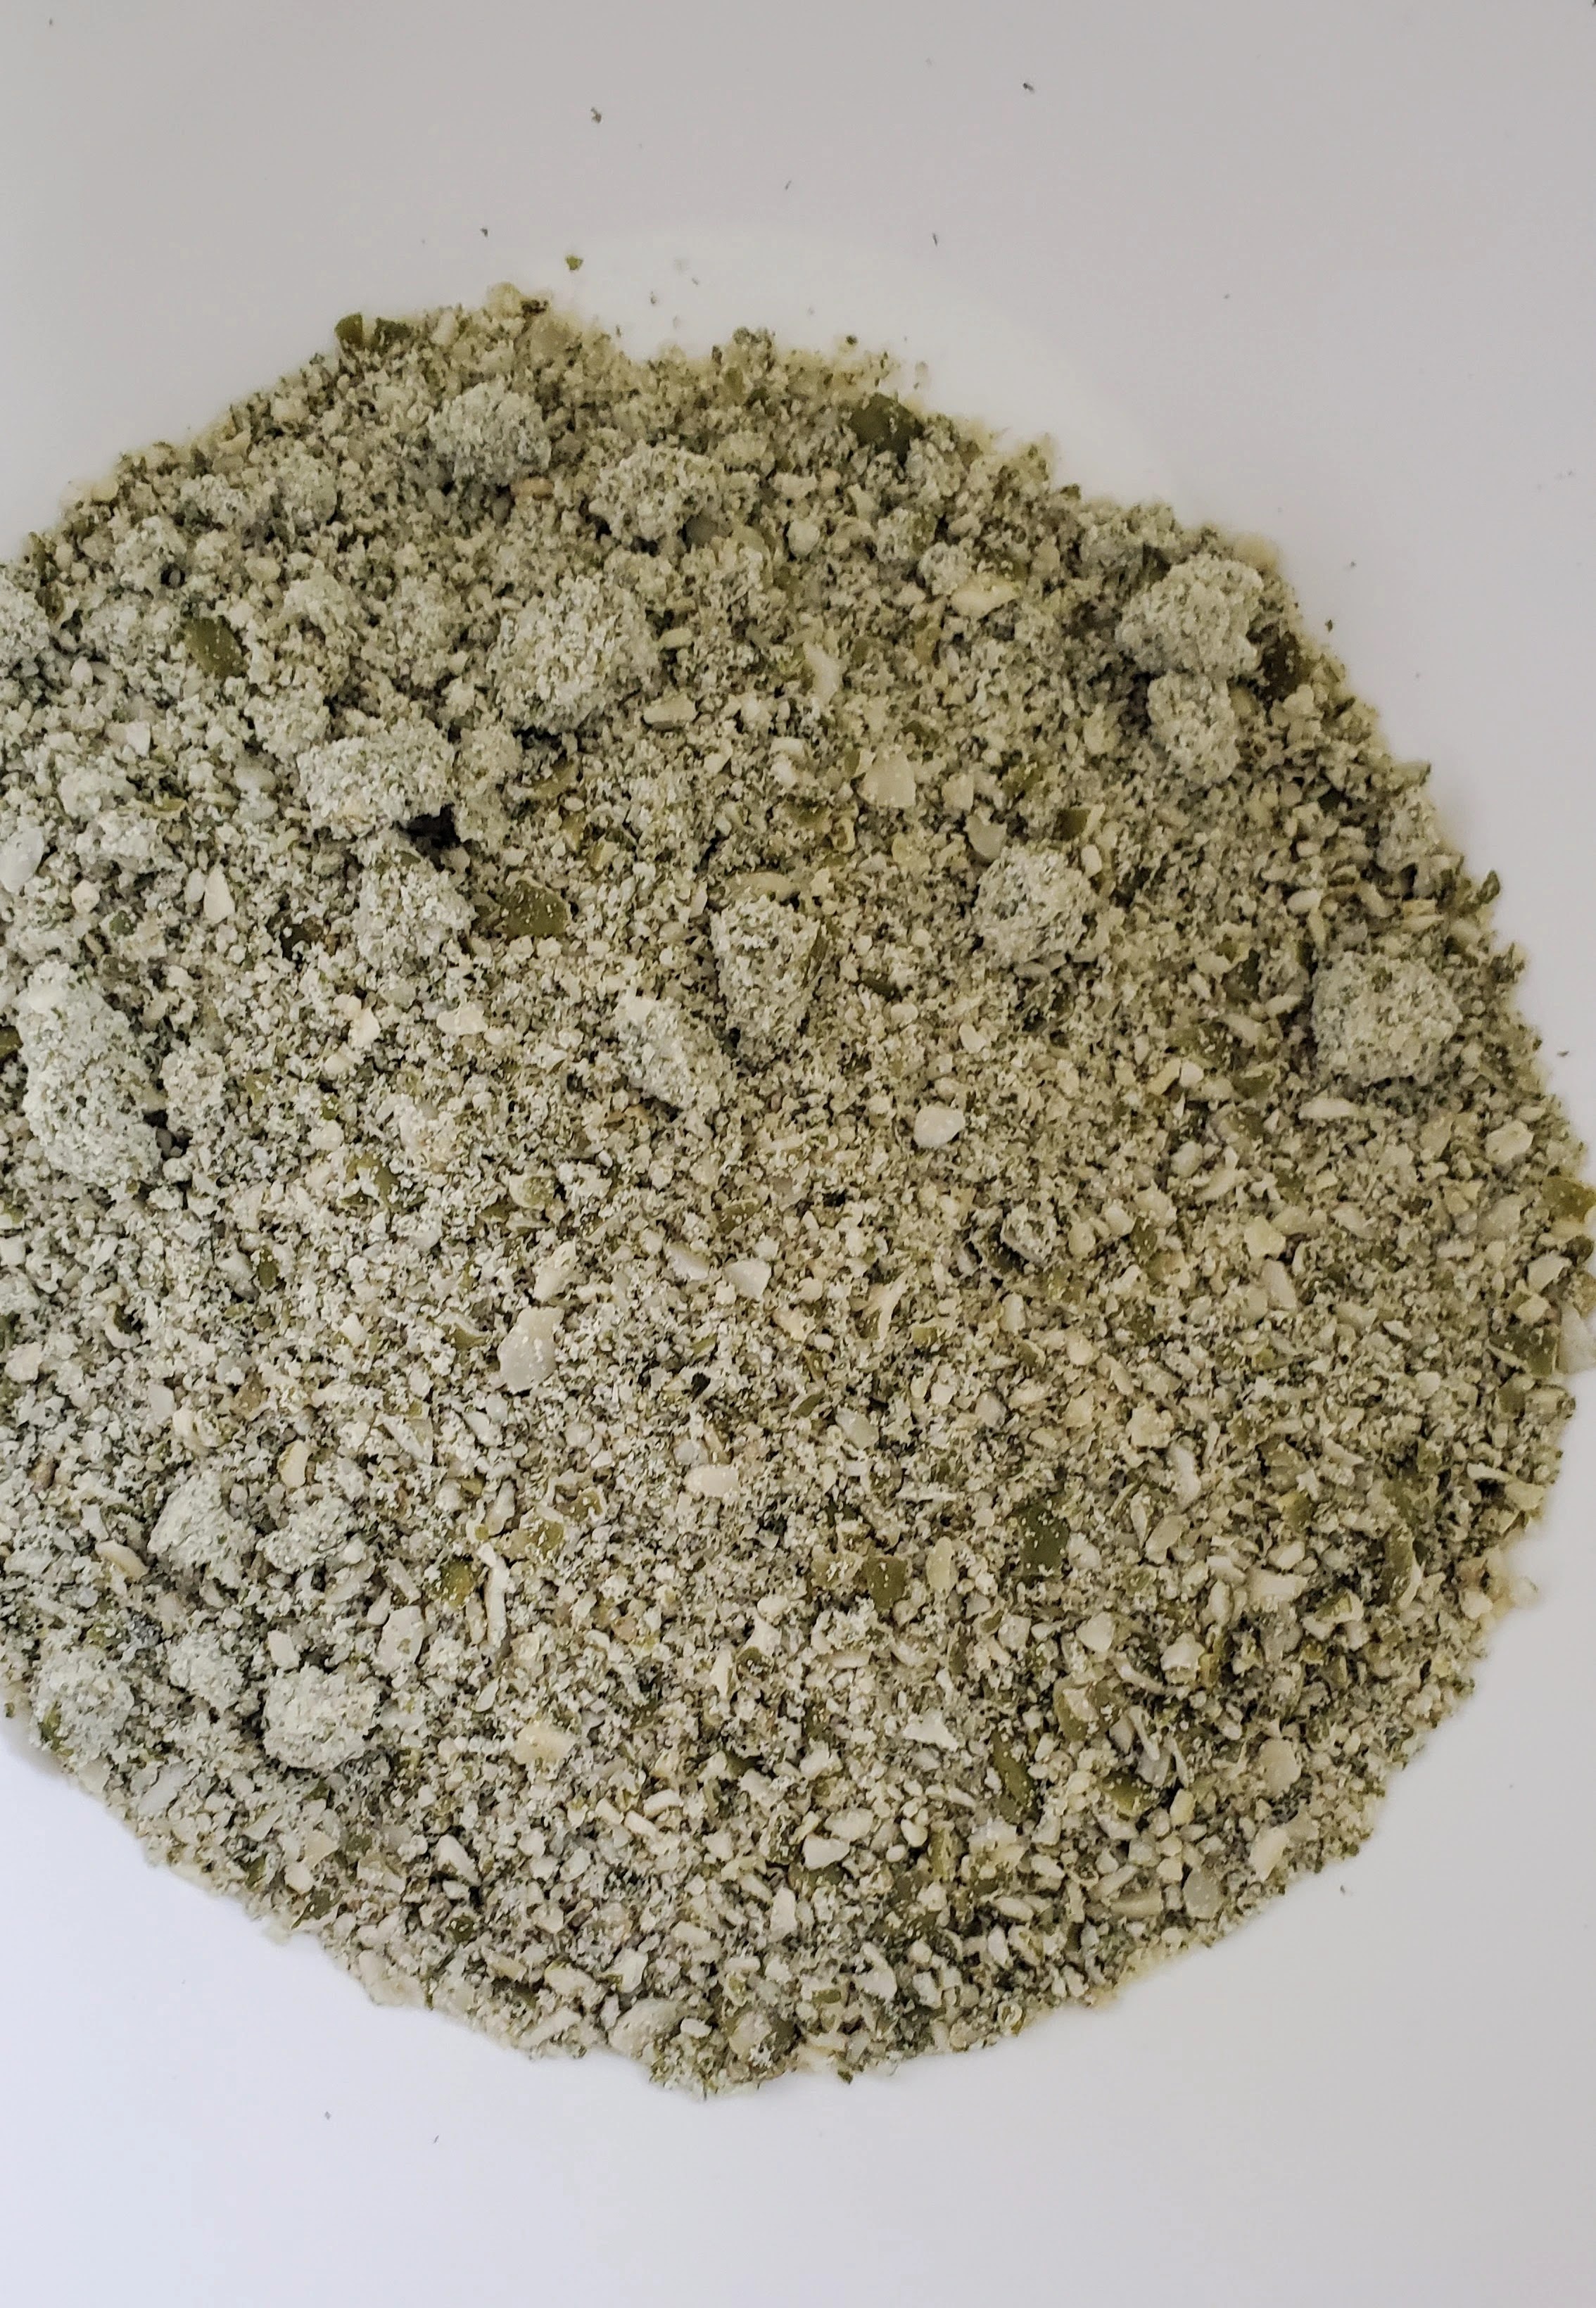
This is what a cup of ground pepitas should look like. You want some course bits in there because they add to the bite of the bread.

A note on psyllium husk: many recipes for this kind of bread depend on a LOT of psyllium, which can result in a lot of time on the loo for some people. For others, like me, it simply creates enough tummy discomfort that I don't love it. For this recipe, you'll see that I advise you to play with ratios of ground flax to psyllium. They both serve the purpose of quickly absorbing the warm water and binding the bread dough. So you're aiming for 1/3 of a cup of psyllium and flax combined. I bet using only ground flax would work just fine too.


Once you've added the liquid ingredients, it'll look loose like this. Just give it a couple of mins and then go in with your hands.

The warm water quickly activates the flours (and flax and psyllium) and you should be able to gently pull the dough into a ball like this. It does NOT NEED TO BE KNEADED.
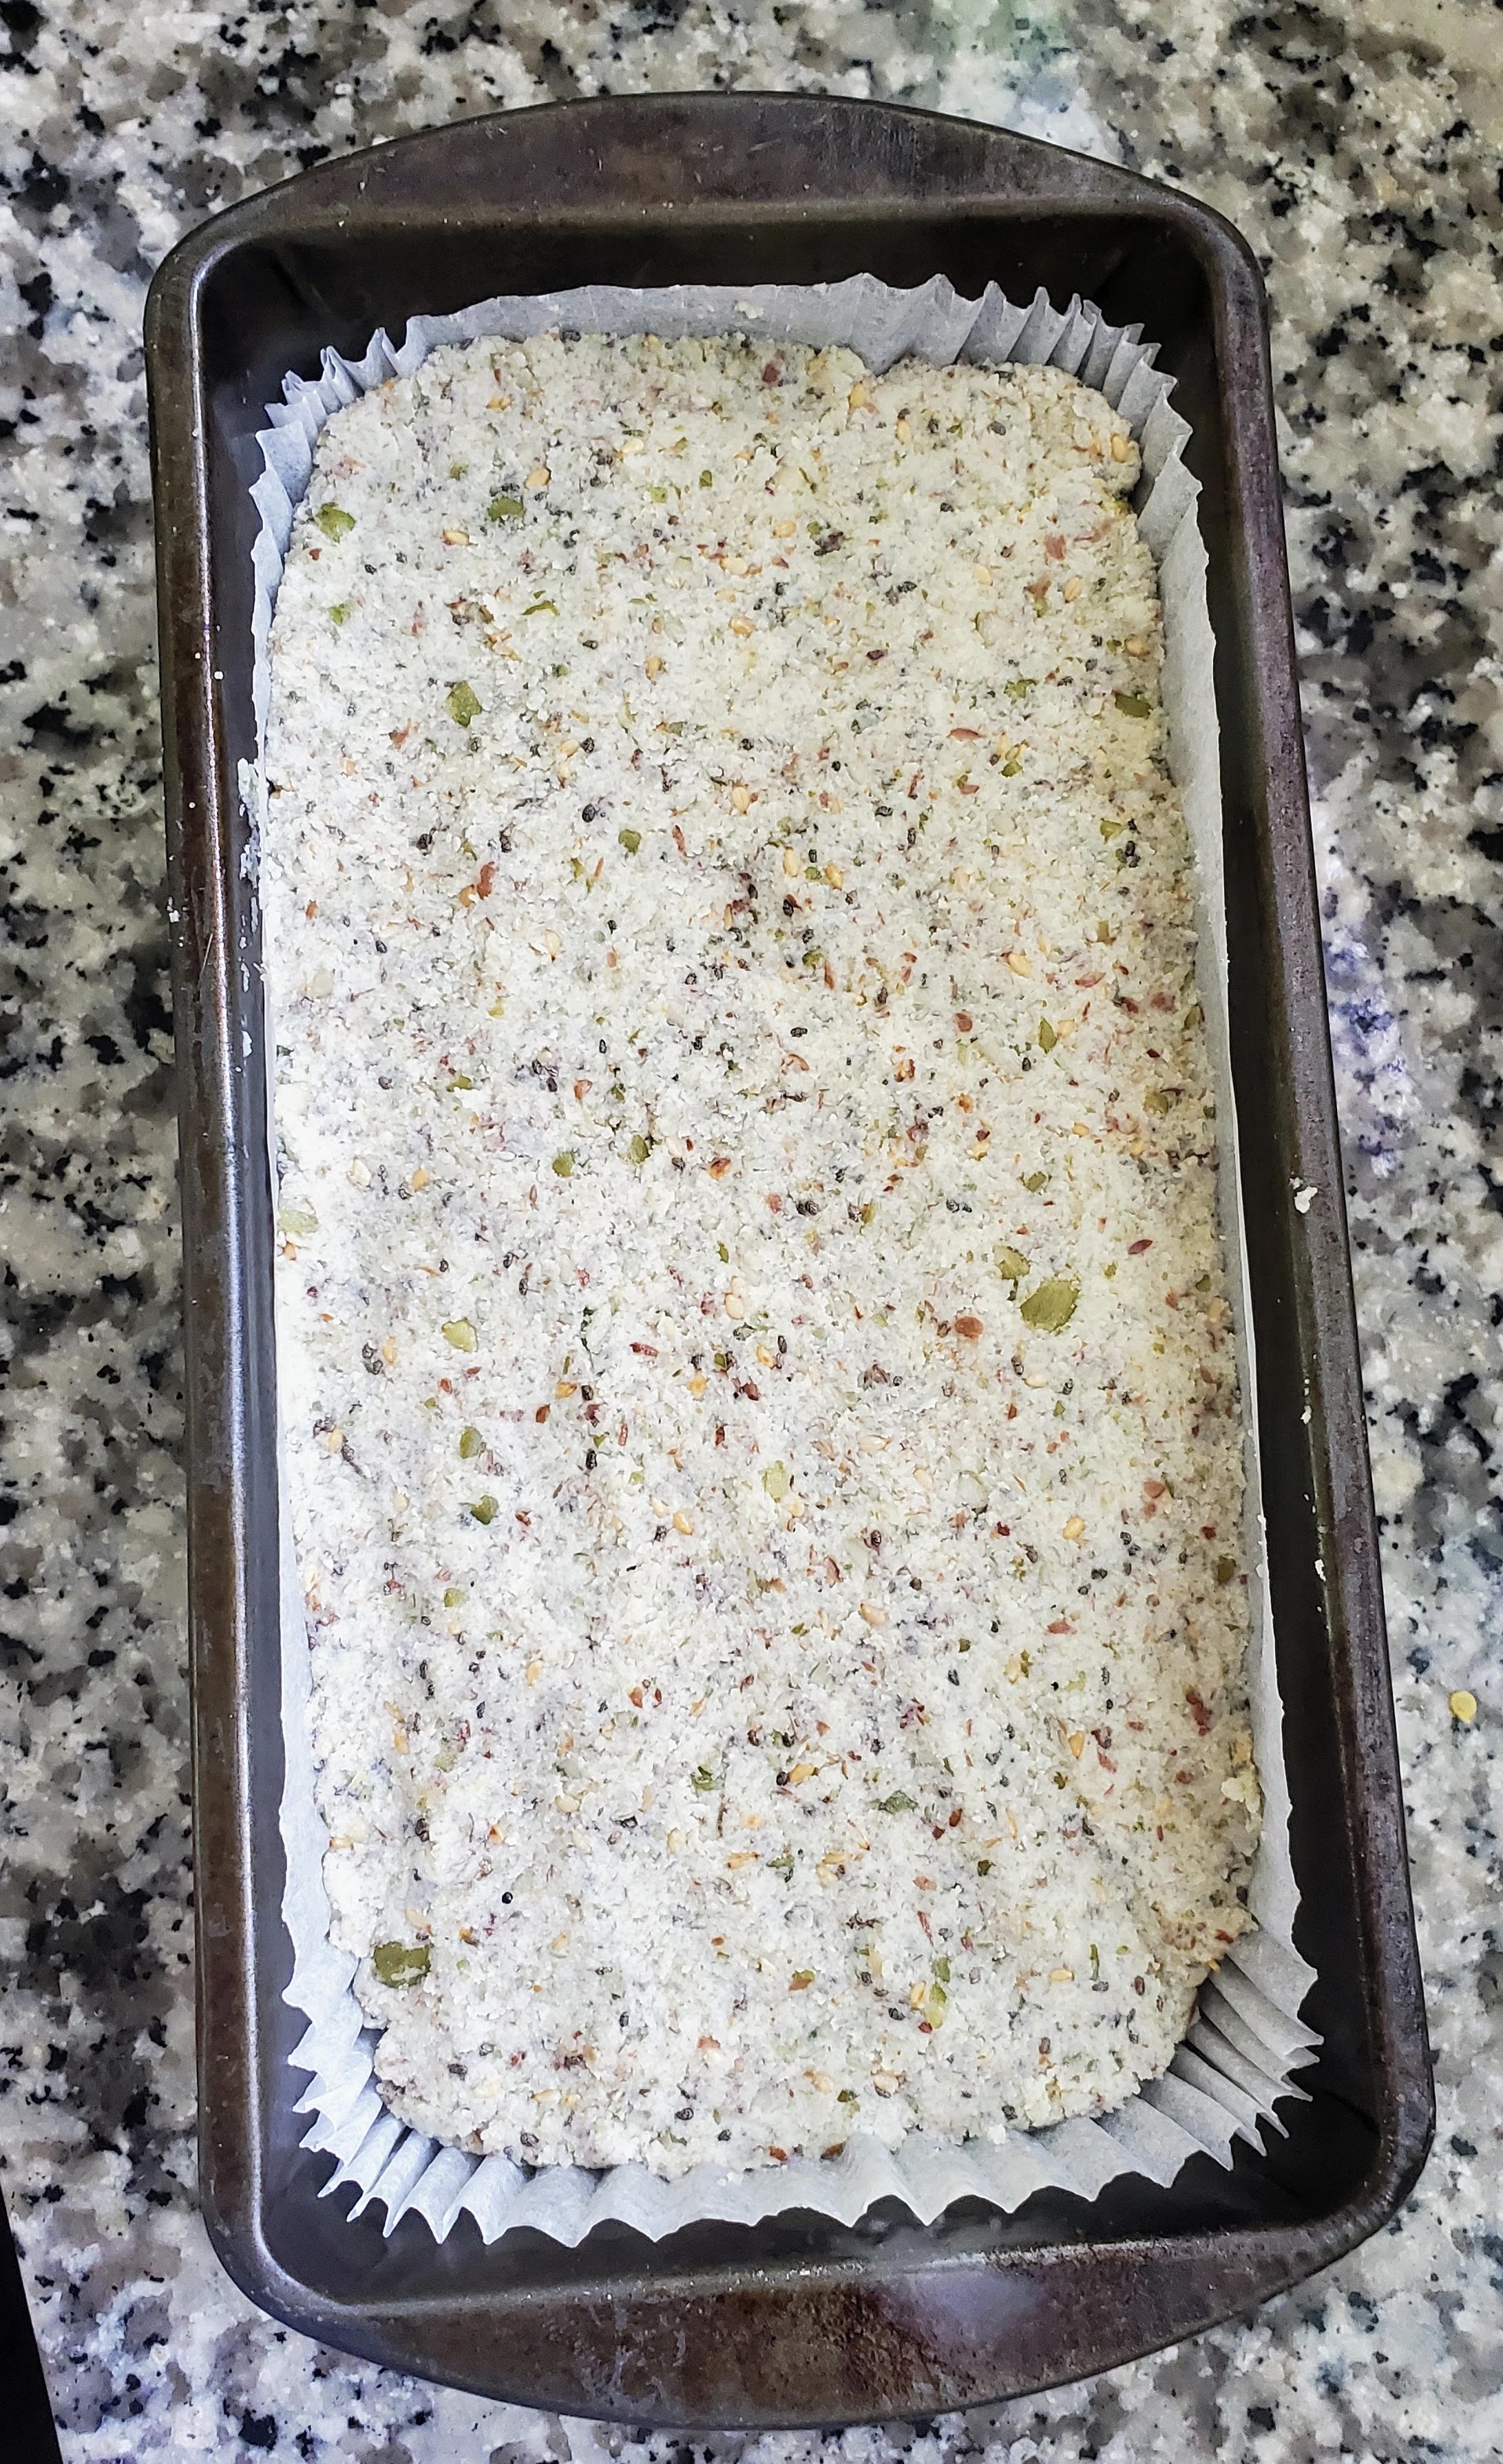
Then you pop it into a paper-lined pan and decide how to shape it. If you want a loaf that's rounded, then form that shape in the bowl before popping it into the pan. I like to spread it out in the pan and so I end up with slices that are even and rectangular (easier to store in the freezer).

After approx. 50 mins, your loaf will be golden like this. And yes, I'm lazy and buy loaf-tin liners versus measuring out pieces of parchment paper every time.


Finally, here's my storage tip: I'm the only one eating this bread and I need it to last. So once it's cool, I slice it up and lay the pieces out on a cutting board. Then I freeze them like this. Once they're frozen, I pack them all into a container or bag and it stores easily in the freezer for weeks. I pop a frozen slice straight into the toaster on it's maximum setting (7 mins) and that's usually enough to get it from frozen to toasted.
How to eat this?? Any way you like! But I love to use it for Avocado Toast because it works beautifully with creamy avo. It's also delicious with almond butter and/or Choc Zero raspberry or strawberry jam.
- Preheat the oven to 400F/200C and line a 9x5 inch loaf pan with parchment paper. Lightly oil the paper and set aside.
- Combine all the dry ingredients in a large mixing bowl - you may need to work some lumps out of the almond flour.
- Stir in the liquid ingredients, making sure the water is warm otherwise the flours won't activate as well or as fast.
- Stir with a spatula or a fork first until the ingredients are well combined and let it sit for just a couple of mins. Then you should be able to use your hands to pull the dough into a ball (see the pictures above). It it's too sticky to do this, give it another few minutes and the consider sprinkling in a little more ground flax.
- Once you're able to form the dough into a clean-ish ball (or cylinder) you can drop it into the lined loaf tin. Whatever shape it has going into the oven is the shape it will keep - it doesn't rise or expand. So you decide what works for you. I generally flatten is down so I end up with pretty even rectangular slices. It doesn't look as pretty, but it's practical!
HOW TO MAKE NUTTY SEED BREAD
INGREDIENTS
- 1 cup of almond flour
- 1 cup of lightly ground pumpkin seeds (must be shelled seeds - see above for how to make this)
- 1/2 cup of coconut flour
- 1/3 cup mix of psyllium husk and ground flax (depending on your tolerance for psyllium)
- 1/4 cup of chia seeds
- 2 tablespoons of sesame seeds
- 1 teaspoon baking powder
- 1 teaspoon salt
- 2 tablespoons of grape seed oil (or olive or almond)
- 1 teaspoon of apple cider vinegar or lemon juice
- 2 cups of warm water (40C/105F) - think hot bath temp which is what comes out of most hot-water taps
STEP BY STEP
- Preheat the oven to 400F/200C and line a 9x5 inch loaf pan with parchment paper. Lightly oil the paper and set aside.
- Combine all the dry ingredients in a large mixing bowl - you may need to work some lumps out of the almond flour.
- Stir in the liquid ingredients, making sure the water is warm otherwise the flours won't activate as well or as fast.
- Stir with a spatula or a fork first until the ingredients are well combined and let it sit for just a couple of mins. Then you should be able to use your hands to pull the dough into a ball (see the pictures above). It it's too sticky to do this, give it another few minutes and the consider sprinkling in a little more ground flax.
- Once you're able to form the dough into a clean-ish ball (or cylinder) you can drop it into the lined loaf tin. Whatever shape it has going into the oven is the shape it will keep - it doesn't rise or expand. So you decide what works for you. I generally flatten is down so I end up with pretty even rectangular slices. It doesn't look as pretty, but it's practical!
- Bake for 50 minutes then insert a skewer in the middle of the bread. If it doesn't come out clean, bake for another 10 mins then check again. And if it looks like it might burn on top during these extra mins, pop a piece of foil over the top.
- Cool on a rack for at least a couple of hours before slicing, although if you slice off one end to eat warm, I won't tell anyone.
- Store for up to a week in a pantry, wrapped in a kitchen towel. Or slice the whole loaf and freeze the slices so they're ready to toast (see the picture in the blog post). The max time on my toaster is 7 mins and that's what it takes to defrost the slice and also toast it a little.
Breads & Muffins
Recipes

.webp)


- Preheat the oven to 350F. Prepare a 6-cup nonstick muffin pan with either olive oil or baking spray.
- Stir together the almond meal, baking powder, cinnamon, and salt in a large bowl.
- In a separate bowl, whisk together the eggs, applesauce, and vanilla extract.
- Pour the wet ingredients into the dry ones and mix until there are no dry patches. Once the batter is smooth (and the oven preheated), fold in the blueberries. It's crucial that they go in last, otherwise they start defrosting in the mixture and turn everything purple.
- Divide batter evenly among 6 muffin cups. Give the pan a few gentle taps on the counter to remove any air bubbles.
- Bake for 25-30 mins. The muffins are cooked if a toothpick comes out clean when inserted into the center of a muffin. Let the muffins cool on a wire rack for 10 mins before serving. Leftover muffins can be stored in the fridge for up to 2 days and in the freezer for up to 6 months. So make a double batch!
No-sugar blueberry muffins

There's a lot to love about these almond-flour-based muffins. Yes, they're sugar- and gluten-free and each one serves up 10g of protein. But the best part? Feel free to top them with favorite sweet things like Nutella or nut butter and jam, and they'll still get a high score from ZOE. (What's ZOE? Read about it here). My recipe is inspired by one I found in The Blood Sugar Solution Cookbook by Dr Mark Hyman. (Disclosure: Some of the links on this page are affiliate links. This means that, at zero cost to you, I will earn an affiliate commission if you click through the link and finalize a purchase.)
First, here's the ZOE score for the muffins alone:
.webp)
With ZOE, you're aiming to eat meals that score 75 or more so this is great score for a muffin. Here's what happens if you pair it with Nutella:
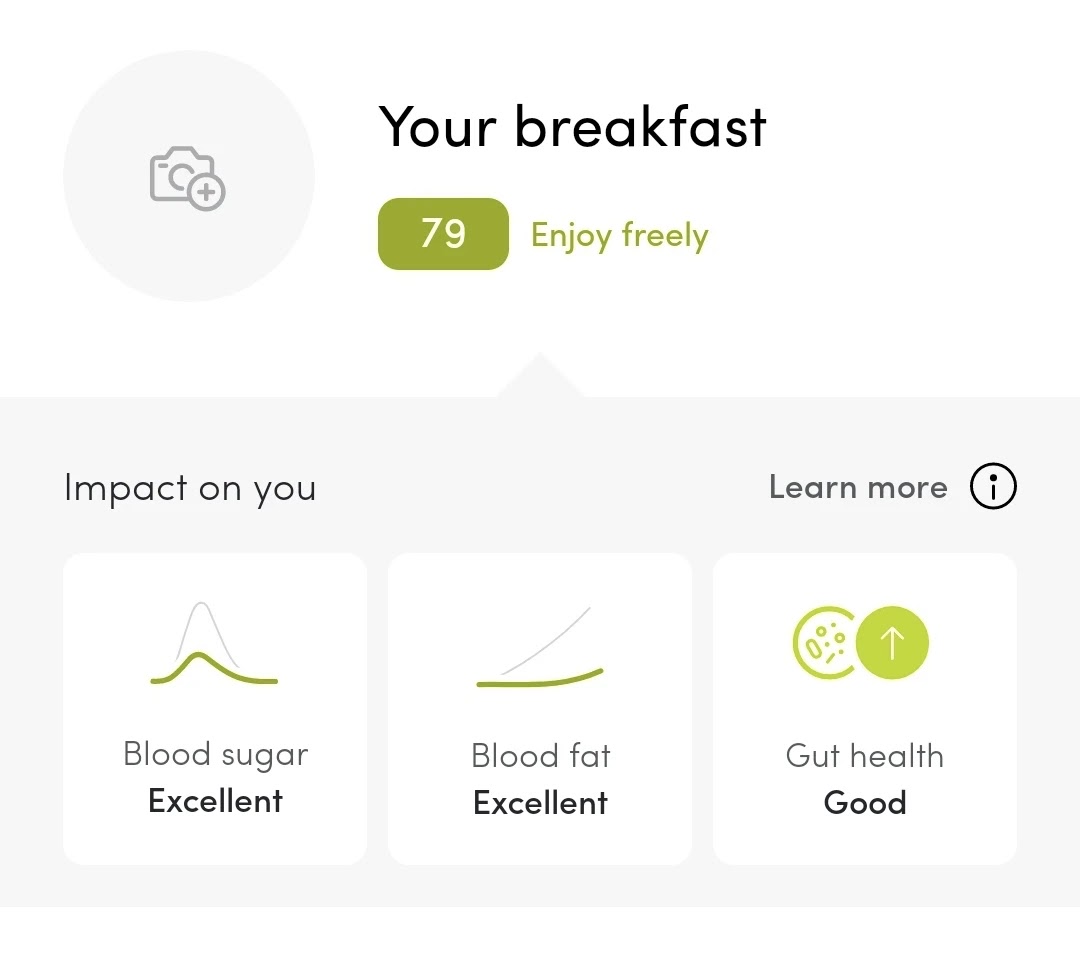
It's still a decent score considering how much sugar is in Nutella, and my 12-year-old daughter loves this combination. Instead of Nutella, consider Choc Zero's keto spread - there are 4 flavors.
Want to take the score up to 93? Pair a muffin with almond butter and my favorite sugar-free jam:

I hope you're convinced that a sugar-free muffin can be really delicious! Let's get into the recipe.

You need a couple of mixing bowls and a large muffin tray (this makes six big muffins). Muffin ingredients:
Olive oil or non-stick cooking spray
Almond meal
Baking powder
Cinnamon
Salt
Eggs
Unsweetened applesauce
Vanilla extract
Frozen blueberries
Hemp seeds (optional)
Preheat the oven to 350F and prepare a 6-cup non-stick muffin pan with olive oil or baking spray.

Combine the dry ingredients in one bowl, the wet ingredients in another (except the blueberries - they go in as late as possible). Pour the wet ingredients into the dry ones and mix until there are no dry patches. Once the muffin pan is greased and the oven is ready, add the blueberries. They need to go in right before you put these babies in the oven. This prevents the berries from defrosting into the mixture and turning it all purple.

The muffin cups should be close to full, then pop them in the oven for 25-30 mins.

They're done when they're golden and a toothpick inserted into the middle of a muffin comes out clean.

Pop them out onto a cooling tray for at least 10 mins before serving.

These muffins can be stored in the freezer for up to 6 months so do yourself a favor and bake a double batch!

And remember: adding almond butter and/or Choc Zero raspberry or strawberry jam will add even more plants to your meal and make them extra yummy.
HOW TO MAKE SUGAR-FREE BLUEBERRY MUFFINS
INGREDIENTS
- Olive oil or non-stick cooking spray
- 1 cup of almond flour (or meal - that works too)
- 2 teaspoons baking powder
- 2 teaspoons ground cinnamon
- 1/4 teaspoon sea salt
- 4 large eggs (I haven't tried a vegan substitute but I bet it would work fine)
- 1 tablespoon unsweetened applesauce
- 1 tablespoon pure vanilla extract
- 1 cup of frozen blueberries (the smaller the better)
- Optional: 1.5 tablspoons of hemp seeds because they're great for you and this is good way to sneak them in.
STEP BY STEP
- Preheat the oven to 350F. Prepare a 6-cup nonstick muffin pan with either olive oil or baking spray.
- Stir together the almond meal, baking powder, cinnamon, and salt in a large bowl.
- In a separate bowl, whisk together the eggs, applesauce, and vanilla extract.
- Pour the wet ingredients into the dry ones and mix until there are no dry patches. Once the batter is smooth (and the oven preheated), fold in the blueberries. It's crucial that they go in last, otherwise they start defrosting in the mixture and turn everything purple.
- Divide batter evenly among 6 muffin cups. Give the pan a few gentle taps on the counter to remove any air bubbles.
- Bake for 25-30 mins. The muffins are cooked if a toothpick comes out clean when inserted into the center of a muffin. Let the muffins cool on a wire rack for 10 mins before serving. Leftover muffins can be stored in the fridge for up to 2 days and in the freezer for up to 6 months. So make a double batch!
Subscribe to:
Posts (Atom)